I have taken the plunge and shifted the blog over to WordPress. For various reasons (read Blogger errors) WordPress suits my blogging needs better.
I have also taken the opportunity to change the blog name. It is now "The Other Tank".
I would encourage you to head over to the new site at theothertank.wordpress.com and have a look.
I will discontinue updates to this blog as of now and all future content will be over on the new site.
See you there!
V
February 24, 2011
February 22, 2011
The Art of Screen Shots - Angles and Distance
I mentioned in the last post that all you really have control of when taking a screen shot is what direction you face, how high up you are and how close you are to the subject.
This post is going to tackle that.
There are two halves involved in the creation of a fantastic screen shot. Firstly, giving yourself something to work with. Secondly, bringing out what you are looking for.
In order to give yourself something to work with, it is not simply a case of finding something you think looks cool and pressing the PrtScr button. Taking a little bit of time to explore the shot can make all the difference.
What direction you face and how high up you are (thank God for flying in the old world!) combine to give you the ability to control angle. When you see a subject on your screen you think will make a great shot, try to remember that in WoW most objects are represented in 3d space. This means you can fly around it, over it and sometimes under it. The straight on at eye level shot is not always best. In fact, moving your character around a bit can open up some very interesting and unique angles you may not have seen before.
This shot of the Stormwind dwarven quarter illustrates the concept of having to think in 3d space. The black arrow represents the approximate spot I'm going to stand for the second shot.
 |
| Stormwind Dwarven Quarter |
By shifting the viewpoint to here:
 |
| Just Craning Around |
February 17, 2011
The Art of Screen Shots
In the next few posts, I am going to run through a few of the techniques and mindsets that I employ when I am taking photos screen shots.
Taking a screen shot of something like WoW is used for so many different purposes that I am not going to try and cover them all. What I am going to focus on is the type of screenshot that doesn’t involve a UI or dead/sleeping characters arranged in a phallic symbol. In other words, serious screen shots of in-game locations, encounters and characters.
Taking a screen shot is pretty similar to taking a photo, just with less complexity. You don’t need to worry about light meters, exposure and shutter speeds, but you do need to think about composition and subject.
For me, the biggest thing about taking a great screen shot is being able to see the end product before you take it. This is the same when taking a photo, and I think divides the good photographers from the great ones. What I mean by this is that some people look at a building and just see the building, others look at the same building and see angles from which they could take a photo to capture that pattern in the windows, or the old fire escape stairs around the back or any number of potential shots.
February 14, 2011
Atramedes as Melee
In between dodging sonic circles, sonic bombs, sonic fire on the ground and in the air and some sort of death laser ability, Atramedes is actually (I think) a fun fight. The best thing is, the fight only needs one tank so I can spec frost and get my dps on!
The fight itself is another Cataclysm encounter that moves away from the stand on X, do Y and Z will happen mantra and more to a mindset of making sure you are keeping yourself alive and raid aware to eventually kill the boss (like Omnotron).
The fight employs a mechanic somewhat like the insanity meter in the Ulduar Yogg-Saron fight. Basically, if you take any sort of damage from the boss, you gain sound. The more sound you have, the greater the amount of damage you take from the boss – so it’s a circular arrangement. If you reach 100 sound, the boss will kill you. TLDR: sound bad.
As a melee dps, what you need to do is very similar to the tank so I will cover both roles here. There are a few abilities that you must stay on top of to survive this fight. There are two phases to the fight, both of which I will go through.
February 13, 2011
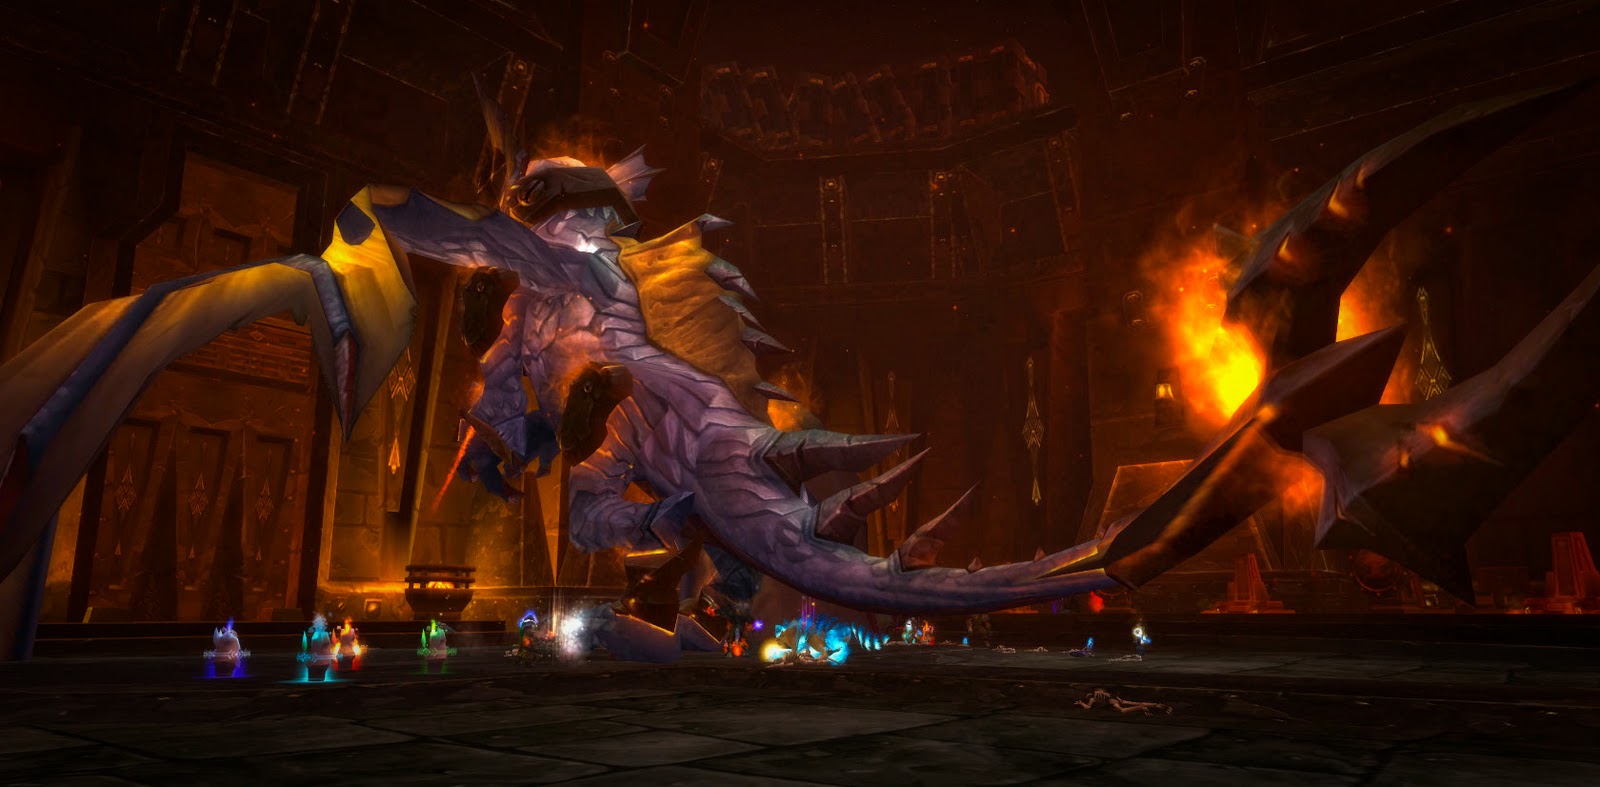
Some Magmaw shots
Here are a few shots from our Guild Magmaw run tonight, was on my hunter for this one, which was a nice change from my DK. We sent in a second team which consisted of people who hadnt really been on a raid with us before and some alts, including mine. Was a good positive run.
 |
| The Worm's Lair! |
 |
| What exactly is worm spew made of? |
 |
| Angelic! |
February 10, 2011
Atramedes Kill
Here are some nice screen shots of our Atramedes kill tonight :)
 |
| Coming in to land from Phase 2 |
 |
| Sonic Breath |
 |
| The money shot! |
February 7, 2011
100 Games - A part of my Collection
Out of sheer boredom I have compiled a list of my PC games (some of them anyway). I started with what my Steam account lists, and then added what I can remember is sitting, off the top of my head, in my cupboard at home. Funnily enough the list is 100 items long.
I don't think it is by any means exhaustive, but it is a start. You must understand that I have been playing PC games for years, ever since my first Commodore 64. I haven't listed those really old games here (looking at you 5th Gear), but I'm sure you can think of a few classics.
Looking down at the list kind of makes me wonder if I have misspent my youth somewhat, staring at a PC screen for days on end. Somewhat sadly, my Steam game time on record (not very accurate) is at 498 hours; just shy of 21 days... and that's just Steam! Top of that list is MW2 at 168 hours played!
And I'm not even going to mention my console games.
Without further adieu, here is my list:
Age of Conan
Age of Empires
Age of Empires 2
Age of Mythology
Alien Swarm
Assassin's Creed
Assassin's Creed II
Balder's Gate 2
Batman: Arkham Asylum
Battlefield 1942
Battlefield 2
Blood Bowl: Dark Elves Edition
Call of Duty
Call of Duty 2
Call of Duty 3
Call of Duty World at War
Call of Duty: Black Ops
Call of Duty: Black Ops - Multiplayer
Call of Duty: Modern Warfare 2
Call of Duty: Modern Warfare 2 - Multiplayer
Command and Conquer (all titles)
Commander Keen Complete Pack
Counter-Strike: Source
Day of Defeat: Source
Deus Ex
Deus Ex: Invisible War
Devil May Cry 4
Diablo 2
DogFighter
Dragon Age: Awakening
Dragon Age: Origins
Elder Scrolls: Morrowind
Elder Scrolls: Oblivion
Europa Universalis III
Everyday Shooter
Fable
FIFA (multiple)
Flotilla
Garry's Mod
Gratuitous Space Battles
Guild Wars
Guns of Icarus
Half-Life 2
Half-Life 2: Deathmatch
Half-Life 2: Episode One
Half-Life 2: Episode Two
Half-Life 2: Lost Coast
Half-Life Deathmatch: Source
Half-Life: Source
Hawx
Just Cause 2
Killing Floor
King Arthur - The Role-playing Wargame
King's Bounty: Armored Princess
King's Bounty: The Legend
Lara Croft and the Guardian of Light
Left 4 Dead
Lord of the Rings Online
Magic: The Gathering - Duels of the Planeswalkers
Magic: The Gathering Online
Magicka
Mass Effect 2
Medal of Honour: Airborne
Medieval 2 Total War
Medieval Total War
Neverwinter Nights
Neverwinter Nights 2
Order of War
Portal
Prince of Persia: The Forgotten Sands
Prince of Persia: The Sands of Time
Puzzle Quest
Red Alert (all titles)
RIP
RIP 2: Strike Back
RIP 3: The Last Hero
Rome Total War
S.T.A.L.K.E.R.: Shadow of Chernobyl
Shogun Total War
Sid Meier's Civilization IV
Sid Meier's Civilization V
Smashball
Spore
Spore: Creepy & Cute Parts Pack
Spore: Galactic Adventures
Star Wars: The Force Unleashed
Starcraft
Starcraft 2
Supreme Commander
Supreme Commander 2
Team Fortress 2
The Secret of Monkey Island: Special Edition
Titan Quest
Titan Quest: Immortal Throne
TrackMania United
Warcraft 2
Warhammer 40,000: Dawn of War
Warhammer 40,000: Dawn of War II
Wings of Prey
World of Warcraft
Anything on that list jump out at you? Any of your favourites there? Are any not listed? Let me know in the comments below!
V
February 3, 2011
Chimaeron – seemed a touch underdone
I mentioned in my last post that we were about to have a crack at Chimaeron. On Wednesday we had a few dummy runs to see how the fight worked, seemed ok.
Last night we went in fresh, having cleared the first 3 in the one night we were all keen to have a good crack at Chimaeron. Little did we know what was in store for us, what was going through the heads of the 3 headed dragon (?).
We had a quick chat before we engaged; talking about positioning and the best way to do the collapse after the robot went offline. That was simple enough, collapse on the druid with the star, who happened to be standing right behind me.
The boss strategy itself, from a tanking point of view, is close to being boring to be honest. Main tank stands in front of him and holds agro. Off tank stands off to one side and taunts the boss when he gives himself a buff letting you know he is about the double strike. After you see the slash animation, you (as the main tank) taunt him back. Phase 2 involves staying alive with all your cooldowns for as long as you can. You will die though, no question. You don’t get any heals you see… the healers go all trigger happy and start spamming (bring back the wanding days I say!) the boss.
So anyway, we engage. Off tank and I play a little ping pong with boss, we push him into phase 2. I die shortly after. Our assassination rogue then evasion tanks him for a bit (5 dodges in a row I think he managed) and then dies. Then the boss dies.
First pull, no joke.
I didn’t think he would be that hard, but first pull? Really? Possibly the new lootship? It was probably harder for the healers? Maybe I just simply missed something, some uber epic mechanic that bugged out on us?
Still, it got us all going and was a nice start to the evening. Atramedes seems a different prospect but still not that hard, mainly a case of dodging stuff. I will put some more thoughts up on him once we get the blind dragon down.
Till then:
Lord Victor Nefarius: Stop fighting yourself THIS INSTANT Chimaeron!
V
February 2, 2011
Blackwing Descent – DK Tanking Magmaw, Omnotron and Maloriak
Inspired by my guildmate Glowberry’s musings on healing in BWD, here are my thoughts on tanking in the same encounters. This will be a longish read so be warned.
Magmaw
The strategy we use for Magmaw only requires a single main tank, so for this fight I switch to Frost and get my dps on. I actually really enjoy dpsing this fight, not only because I can hit 20k but because I get to do something other than beat on the boss. This fight requires some thought on rune conservation and making sure Frost runes are available for the lava parasites.
From start to finish, here are my thoughts.
Until the first pillar of flame I simply work on the boss while keeping an eye on the pillar of flame cooldown. Once that starts getting under 10 secs, I stop using any abilities that use a Frost or Death rune. This is so that I have the maximum number of Howling Blasts (HB) available for the parasites.
As soon as the pillar falls on our pillar soaker who is standing at range (usually a Mage or Warlock) I run out dropping a Death and Decay over the spawn point. Once in range I then start spamming HB. I have specced into Chillblains and glyphed HB. This means that HB applies Frost Fever to all targets it hits and then Chillblains slow every target affected by Frost Fever by 25%. This gives me time to get 6 or 7 HB’s making sure that I firstly get the threat on all the parasites meaning I kite them away from the raid and secondly do an enormous amount of damage to them (this is sole reason I can hit 20k).
Once the parasites are down I switch back to Magmaw and the process is the same for the second pillar or flame. Once the main tank gets mangled (eaten), there is usually no more pillars, however this is not always the case so you need to stay aware and react accordingly if another one falls.
Once we are in the clear as far as pillars go, I simply wait for Magmaw’s head to be impaled and then go to town on it. The entire fight is just a rinse and repeat of this cycle. Hit the boss, kill the parasites, hit the boss; all whilst avoiding the fire. Cake.
Omnotron
This fight is a little more complicated than Magmaw but still not that bad once you are used to the 4 different golems. Due to the need for 2 tanks in this fight, I have switched back to Blood.
There are 4 bosses in this fight, each with their own set of abilities. Arcanotron uses arcane abilities, Electron uses electrical abilities, Magmatron uses fire abilities and Toxitron uses poison abilities.
By far the worst of these bosses to tank is Arcanotron. He has 2 abilities that make him irritating. The first is Arcane Annihilator, a fast cast that should be interrupted as often as possible. The problem is, a Blood DK only really has 1 reliable interrupt (whose cooldown is longer than Arcanotrons). The other is on too long of a cooldown, requires a blood rune and is on the global cooldown. The second ability is Power Generator, a swirly pool on the ground from which the boss must be moved as soon as possible as it gives a large damage boost to anything standing in it.
The other 3 bosses aren’t too bad from a tanking point of view, pretty much stand and deliver stuff apart from the occasional moving out of Toxitron’s poison cloud. There are however a couple of little niggles that you need to be aware of. The first is the change over, for a short period of time, you have 2 golems beating on you. This is the time when the raid is most likely to wipe as the tanks are tanking much more damage than usual. This can be partly negated by doing 2 things; making sure you have an emergency button available (Icebound Fortitude being the best) and place yourself a distance away from the activating golem where possible so that he has to run to you. Hopefully by the time he gets to you, the previous golem will have deactivated. This is possible because the golems retain their threat tables between activations.
Apart from the above, the only real movement you will have to do in the fight is when kiting Arcanotron around. Our guild employs a strategy whereby we move Arcanotron towards the group of ranged standing towards the rear of the room so that he drops his pools near them. This provides the damage boost but also gives some much needed mana regen. Occasionally the tank not on Toxitron will get a slime focussed on them, which will require some movement away from said slime.
It is also important to remember that you cannot hit the bosses while their shields are up. Thankfully they are only up for a relatively short period of time, namely from 45 to 30 energy. Once you pass 30, feel free to start beating on the boss once more, which in my case gives me the much needed Death Strike heals and blood shield.
This fight is another rinse repeat type deal, except that you need to be aware of what boss is activating next (usually this falls into a pattern after a couple of rounds) and make sure you are positioned correctly as well as proper use of cooldowns. We found it very messy until everyone was fully aware of how to interact with each of the bosses abilities. We are now at a stage where we can get them down in 3-5 attempts.
Its not too bad once you get a handle on it, just need to stay aware of what’s going on.
Maloriak
I started off as the add-tank on Maloriak, but we decided that wasn’t working so well so I switched to tanking him instead.
The shifting red/blue/green phases have no effect on the main tank at all; they are a problem for the dps and heals to worry about. What you do need to concentrate on in those 3 phases is controlling the flow of adds. Maloriak casts 2 add summons per coloured phase. He has a total of 18 small adds and 2 large adds. A small add cast summons 3 adds each time. The large add cast, which occurs at 25% summons 2 large adds. The key to this fight is controlling and killing the adds.
The strategy that we employ is as follows. I, as the main tank, interrupt the first cast of the first coloured phase (red or blue) then let the second cast through along with the following 2 casts of the second coloured phase (red or blue). This gives a total of 9 adds prior to the green phase. In the green phase these adds must be burned down by your dps as fast as possible. If not Maloriak gets kinda pissed and starts hitting you very hard indeed. If the adds don’t die, you most likely will.
However, whilst you are madly popping cooldowns to stay alive, you need to interrupt the 2 add casts in the green phase. These are really important. If they make it through, you will have 3 or 6 adds without the green vial debuff, meaning you won’t be able to kill them, meaning you are much more likely to die. Try very hard to interrupt these casts.
Thankfully the time between casts is longer than the cooldown on your Mind Freeze (MF) so it is possible to only use MF. Be aware that the cast will always follow an arcane storm, so don’t jump the gun and interrupt the storm, let the assigned dps handle that one. Abilities like Curse of Tongues really help here.
The red/blue/green vial phase will occur twice. By assuring that only 9 adds are released each time, you allow your add tank to survive, meaning you don’t wipe. If either tank dies, just reset the fight by running out.
The last phase, which occurs once the boss hits 25%, is a dps race. Maloriak has a 7 minute enrage timer and the first time we killed him, we did it in 6 minutes and 58 seconds… so high dps is a must. In terms of tanking this phase you need to make sure you avoid the fire where possible. There is no cast bar for this ability, but if you are standing in it when it is cast you will be thrown up in the air and suffer moderate fall damage. I finally worked out how to avoid it last night. Before each cast he will stop hitting you and stand in the one spot with his arms in the air. This is your queue to move. Simply strafe to one side as fast as possible. Note that if you don’t move early you will still get caught even if it ‘looks’ like you are out of the fire.
I tend to always move in the same direction, clockwise, so that I always have a direction in which to move. This ends up with me doing tight circles around the boss for the entire last phase. The add tank is kiting the 2 large adds this entire time, don’t even attempt to kill them, just focus on the boss.
I guess that the main tank doesn’t have to be the one interrupting the boss, but because you are always targeting him, it is just easier than sacrificing a dps during the green phase. This aspect of the fight really is key to getting him down. In future gear tiers, the off tank and healers may be able to handle more than 9 at a time which would change your interrupt pattern but for now, 9 at a time is about the limit.
So far I have really enjoyed these fights; they feel a more challenging than Wrath with a lot less room for mistakes. We have just ventured into Chimaeron’s lair so expect some more thoughts on that fight once we get him down.
Until then:
My demise accomplishes nothing! The master will have you! You will drown in your own blood! The world shall burn! Aaaghh!
V
January 23, 2011
Australian Games Expo
So I went a little bit silly at the Australian Games Expo in Canberra on the weekend.
I enjoy playing board games. Not the standard fare. Whilst an occasional game of Monopoly or Scrabble can be fun (with the right people), I prefer the deeper kind, mainly those coming out of Europe. Two titles you may be familiar are Settlers of Catan and Carcassonne.
So, the Expo. Well I walked in with the intention of picking up one maybe two titles. Little did I know that my thinking was naïve in the extreme. Two hours later I walked out of the Expo with the following in my hands:
The Alhambra Big Box (base game + 5 expansions in one big box)
Agricola
Sid Meier’s Civilization, The Board Game
How to Host a Murder: The Class of ‘54
Inkognito
Killer Bunnies Remix x2
Carcassonne x2
Bohnanza
Now that’s just silly… Granted that the bottom five of those games were gifts but still, way to blow out.
I guess the upside is that my games collection is starting to look somewhat respectable. It now includes the following great titles:
A Game of Thrones (inc all expansions)
Diplomacy
Dominion (and Intrigue)
Alhambra (inc all expansions)
Risk
LOTRO Risk
Agricola
Civilization
Killer Bunnies
How to Host a Murder (numerous)
and a few of the more standard titles.
My favourite so far would have to be A Game of Thrones. It is a combat orientated game with a fair bit of diplomacy thrown in. It is a combination in fact of Diplomacy and Risk with a few random events that change the game each time thrown in. There are no dice, something I love – the most irritating thing about Risk is the fact you can be totally screwed over by your rolls.
Whilst there is an element of randomness to the game in the form of 3 decks of event cards, they affect each player equally leading to using this well impacting on your overall strategy. Randomness adds replayability , an essential facet of a great game. How this is implemented however is the real ‘game breaker’.
If you play board games, what is your favourite? Is there one that really stands out? One that I should look into?
V
January 19, 2011
Thoughts of Blood
The last time I tanked a raid was in Karazhan – on my Paladin, Althorr. My how things have changed.
After reading up on where Blood tanking was at, bless you Elitist Jerks, I went and reforged my gear to ensure my threat levels would be sufficient. In the end I think I may have gone a bit overboard there, will scale it back for the continuation tonight.
Blood tanking is still a little bit up in the air at the moment. A lot of the discussion on the EJ forums was back and forth between whether stacking Mastery or Avoidance was the way to go. Stacking Stamina has pretty much been ruled out now.
Let me explain the dilemma. The Blood DK mastery is called Blood Shield. Here is the tooltip text:
Each time you heal yourself via Death Strike, you gain 50% of the amount healed as a damage absorption shield. Each point of Mastery increases the shield by an additional 6.25%.
One thing to note however is that the shield only absorbs physical damage. Magical just comes straight through. Ok, so Death Strike heals you for let’s say 30k (not unrealistic), meaning you get a 15k damage shield at 0% Mastery. If you stack Mastery, this starts increasing rapidly. You only need 16 (2868.48 rating) points of Mastery to gets a 100% shield.
By the way, the amount of healing you receive from Death Strike is either, 25% of the damage you received in the last 6 seconds, or 7% of your total health, whichever is higher.
Plus in patch 4.06 we will see the following change to the Shield mechanic:
If Death Strike is used while a Blood Shield is already active, the new absorb will stack with the old one instead of replacing it.
What this gives us is essentially a rolling shield. The current thinking on how this will function is that if you Death Strike with a Blood Shield up, and it has for example 5 seconds to run and a Shield value of 10k, then that 10k will be rolled into the new Blood Shield value of say 20k, giving you a 30k Shield for the new 10 second duration. There is talk of a cap though, which is looking like 33% of max health, meaning that assuming 200% Mastery, you would need to take 110% of your total health as damage within 5 seconds in order to hit the cap.
Essentially, the Blood Shield can be thought of as extra HP, pretty sexy HP though.
Avoidance stacking remains the same as it always has. For Blood DKs there is no difference between dodge and parry as far as weighting goes. More avoidance = less damage from the boss. Where avoidance has a definite advantage over Mastery is that Mastery is reliant on Death Strike connecting. Miss a strike and your shield potentially pops or drops. Avoidance isn’t reliant on anything to connect, giving your healers a potentially easier time of it. In the end there was no definite conclusion as to whether Mastery or avoidance was better, but the following relationship between the two was reached:
1. Avoidance decreases average damage taken, so
2. Avoidance results in smaller blood shields. But,
3. Avoidance effectively increases the pre-avoidance incoming damage you can take before the shield is used up,
4. The effect of avoidance in 1. is balanced out by the effect in 3, so
5. Avoidance has no net effect on the effectiveness of mastery.
So for me, I will be getting hit and expertise near the cap so that my threat is high enough and my interrupts don’t miss, then gemming for Mastery and leaving my avoidance stats as they are on my gear. Any other stats I don’t need UI will probably reforge to Mastery. This should *hopefully* give me a decent balance between the two. Maybe time will tell which is better but for now I’ll just play it by ear and see how encounters go and adjust the balance as required.
Ok, so the raid last night. Magmaw is fast becoming a trivial fight in terms of mechanics. We downed him on the third attempt which was nice as it gave us more time for attempts on Omnitron. I was in Frost spec for the Magmaw fight as it only requires a single tank. I pulled 18k dps on the kill, however this is largely due to Howling Blast on the lava parasites.
I shifted over to Blood for Omnitron. I think it took a few attempts for me to remember that I had buttons such as Icebound Fortitude and Vampiric Blood, but in the end I was basically using them every time they came off cooldown.
Omnitron is a really annoying fight to be honest. None of the Golems in isolation are particularly difficult, but when two are up it can get messy. The most annoying ability as a tank is the blue pools that Arcanotron drops, especially when they are directly beneath him. They can sometimes be hard to see, and if he drops a pool then starts casting Arcane Annihilator then he doesn’t want to move out of said pool. Irritating. The others aren’t too bad, although having to stop attacking when the shields go up can be fun.
Based on the trouble my healer was having keeping me up during the attempts, I have a feeling my gear is not quite up to scratch yet, at least not as much as it could be. It is viable but does make things a little more difficult than it could be on the healers. Something to work on.
We did get Omnitron down to 33ish% which was promising; I don’t think they will last too much longer. People are getting used to the abilities and having to make decisions on the fly, so it shouldn’t be too much longer.
I enjoyed tanking, so if I am required to continue in the dual role I will keep posting my thoughts on where both specs are at. Until next time, I will leave you with this:
Soccothrates and Dalliah from Arcatraz:
Soccothrates: "Did you call on me?"
Dalliah: "Why would I call on you?"
Soccothrates: "To do your heavy lifting now, most likely."
Dalliah: "When I need someone to prance around like an overstuffed peacock, I'll call on you."
Soccothrates: "Then I commit myself to ignoring you."
Dalliah: "What do YOU know about commitment, sheet-sah?"
Soccothrates: "You are the one who should be-- Wait, we have company."
V
January 13, 2011
Ipswich 1 – Arsenal 0
Current Arsenal position – 3rd place in the Barclay’s Premier League.
Current Ipswich position – 19th in the npower Championship.
I’m not convinced Arsenal is going to learn this lesson any time soon. Time and time again, we see a 3rd rate Arsenal show up to games like this, simply expecting to walk it in. When will it sink in? No game is a walk in the park these days, no matter how good you are.
One would expect the team to put Ipswich to the sword after just scraping a draw against Leeds and seeing Chelsea put 7 past Ipswich (they beat Chelsea 3-0 a couple of weeks ago) just the other day. Hard to describe Arsenal’s performance as anything other than diabolical, although credit must go to an Ipswich team that were clearly up for it.
A combination of lazy/sloppy passing and a distinct lack of sharpness in the final third combined with the worst defending I have ever seen from a Premier league side meant that Arsenal doomed themselves, no excuses this time lads – you were shite.
What now? Well we need a decent centre half, that much is certain. I would hazard to suggest we need some better squad players as well. Players such as Eboue, Denilson and Bendtner since his injury are just not up to standard at the moment. Maybe a stint in the reserves in order.
We must not forget however that the team on park had Fabregas, an admittedly out of form Arshavin, Walcott and Jack Wilshere. Not mugs by any means.
Arsenal need to get a result at Upton Park on the weekend, get the train back on track. No more losses to inferior opposition please Wenger. I can handle dropping points to good teams, but teams 36 places below? I don’t think so.
I and I’m sure all Arsenal fans, want a response. A very clear signal that Ipswich was an anomaly, a blip on the radar; seen once then quickly forgotten. Anything else and that monkey aint climbing off any time soon.
The Premier League is a different beast to the Carling Cup – so let’s see some effort lads.
V
January 5, 2011
First Cata Raid - Magmaw down
With our Guildmaster, who also happens to be our primary raid leader, stuck in traffic last night we meekly with great confidence ventured into our first Cataclysm raid. Along with the majority of raiding guilds out there, we opted to have a go at Magmaw, the first boss of Blackwing Descent.
Before we even started, we encountered our first problem – a lack of healers. We have enough raiders to run two strong teams, but we are short on main spec healers. What that meant in real terms was that some people missed out, something we are hoping to address in the very near future.
After being summoned to the instance (a good thing too, I hadn’t actually checked where in Blackrock Mountain the entrance was) we zoned in and headed left. The first trash pull was straightforward, a single patroling dragonkin. He was dispatched easily enough. The second group wiped us a couple of times until we worked out to get two tanks tanking each mob so that they were the furthest player from the mob there weren’t tanking (they periodically charge, stun and dmg the furthest player from them). The rest of us then stood in the middle. After we worked that out and proceeded to down the skull, the cross went nuts and pretty much 1 shot the entire raid.
OK, what happened there…..
Turns out the remaining mob enrages when its life partner is killed. So take 2. Dps the skull down to 15% then switch to the cross, burn it down then finish off the skull before it goes insane. I wonder how many dragonkin orphans we will create this expansion…
Fortunately that’s all the trash before Magmaw, yep 3 mobs…
The great red worm himself was a fun fight. Im not going to run through his abilities or the stock standard strat we used, check out tankspot or youtube for those. I do like some elements of the fight though. It is very healer intensive, some nasty tank and raid dmg flying around. We started with 1 tank, 2 healers and 7 dps (1 of which was our raid offtank), then switched our tanks so that the bear tank moonlighted (successfully) as our third healer.
For me, the best part of the fight is getting to impale Magmaws head on a spike :) Big numbers start flying as we get a 100% damage increase for that phase. Loved seeing some 40k plus crits floating around the screen!
We started our attempts by getting him down to around 75%, enough so that we got him on the spike. After you have seen that part of the fight you have seen it all, it’s just a rinse-repeat deal from there. After that attempt we had a few where we just missed a pillar of flame or didn’t get the parasites down fast enough and wiped early but overall we steadily pushed his health lower with each attempt.
Prior to the very last attempt of the night our best go had been 48%. Being the raid leader, I gave one of the great inspirational speeches in history (something like: this is our last attempt guys, let’s see how much better than 48% we can get him! Awesome, I know)! Whatever I said or whatever people heard, it worked! We had a pretty much flawless attempt and simply owned him. No deaths.
Big shout out and congratulations to the team last night, awesome work! Labyrinth of Lost Souls first Cata raid and our first Cata raid boss down!
Here is a screenshot; I even labelled Magmaw for you :)

Voros
The Lich King: Now I stand, the lion before the lambs... and they do not fear.
Subscribe to:
Posts (Atom)